harbor仓库简单配置说明
- 说明
- 安装docker和docker-compose
- 配置harbor.cfg
- 登录harbor管理后台
- 推送镜像到harbor
- clair插件
- notary插件
- harbor仓库删除docker images镜像
说明
harbor仓库以其易用性和功能强大被大家所用,并且安装也简单,用docker-compose方式启动。安装步骤官方写的已经很详细:https://github.com/bbotte/harbor/blob/master/docs/installation_guide.md
版本:
docker         1.12.6
docker-compose 1.9.0
OS             CentOS Linux release 7.4.1708 (Core)
harbor         v1.3.0
官网说的在线安装会节省空间,不过网络比较慢,所以下载离线安装包898M,下面是离线安装的操作
https://storage.googleapis.com/harbor-releases/harbor-online-installer-v1.3.0.tgz

https://storage.googleapis.com/harbor-releases/harbor-offline-installer-v1.3.0.tgz
如果需要在线安装,配置好依赖软件版本后,执行 install.sh在线安装,使用离线安装包,下面可忽略
需要注意版本
python 2.7.5
make 3.82
go 1.8.3

# ./checkenv.sh
➜ No golang package in your enviroment. You should use golang docker image build binary.
Note: docker version: 1.12.6
Note: docker-compose version: 1.9.0

设置golang的环境变量后,再次验证
# tar -xf go1.8.3.linux-amd64.tar.gz -C /usr/local/
# export PATH=$PATH:/usr/local/go/bin

# ./checkenv.sh
Note: golang version: 1.8.3
Note: docker version: 1.12.6
Note: docker-compose version: 1.9.0
# ./prepare
# install.sh
不管是离线安装还是在线安装,都需要
安装docker和docker-compose
安装docker和docker-compose
yum install docker -y
systemctl enable docker
systemctl start docker
yum install epel-release
yum install docker-compose -y
解压下载的harbor-offline-installer-v1.3.0.tgz,并进入harbor文件夹。
注意:默认安装的harbor在/data文件夹
配置harbor.cfg
为了简单,仅修改hostname为本机ip(不能用localhost或者127.0.0.1),其他都默认,install.sh 安装即可。生产环境肯定是设置域名,而非IP地址,下面可用自己的域名代替实验的IP地址,比如 hub.bbotte.com 代替 192.168.22.69
# ls harbor
common                     harbor_1_1_0_template  LICENSE
docker-compose.clair.yml   harbor.cfg             NOTICE
docker-compose.notary.yml  harbor.v1.3.0.tar.gz   prepare
docker-compose.yml         install.sh             upgrade

# vim harbor.cfg
hostname = 192.168.22.69

# ./install.sh
[Step 0]: checking installation environment ...

Note: docker version: 1.13.1

Note: docker-compose version: 1.9.0

[Step 1]: loading Harbor images ...

[Step 2]: preparing environment ...
Generated and saved secret to file: /data/secretkey
Generated configuration file: ./common/config/nginx/nginx.conf
Generated configuration file: ./common/config/adminserver/env
Generated configuration file: ./common/config/ui/env
Generated configuration file: ./common/config/registry/config.yml
Generated configuration file: ./common/config/db/env
Generated configuration file: ./common/config/jobservice/env
Generated configuration file: ./common/config/log/logrotate.conf
Generated configuration file: ./common/config/jobservice/app.conf
Generated configuration file: ./common/config/ui/app.conf
Generated certificate, key file: ./common/config/ui/private_key.pem, cert file: ./common/config/registry/root.crt
The configuration files are ready, please use docker-compose to start the service.


[Step 3]: checking existing instance of Harbor ...


[Step 4]: starting Harbor ...
Creating network "harbor_harbor" with the default driver
Creating harbor-log
Creating harbor-db
Creating registry
Creating harbor-adminserver
Creating harbor-ui
Creating nginx
Creating harbor-jobservice

✔ ----Harbor has been installed and started successfully.----

Now you should be able to visit the admin portal at http://hub.iris.com.
For more details, please visit https://github.com/vmware/harbor .


安装完毕
# docker-compose ps
       Name                     Command               State                                Ports
------------------------------------------------------------------------------------------------------------------------------
harbor-adminserver   /harbor/start.sh                 Up
harbor-db            /usr/local/bin/docker-entr ...   Up      3306/tcp
harbor-jobservice    /harbor/start.sh                 Up
harbor-log           /bin/sh -c /usr/local/bin/ ...   Up      127.0.0.1:1514->10514/tcp
harbor-ui            /harbor/start.sh                 Up
nginx                nginx -g daemon off;             Up      0.0.0.0:443->443/tcp, 0.0.0.0:4443->4443/tcp, 0.0.0.0:80->80/tcp
registry             /entrypoint.sh serve /etc/ ...   Up      5000/tcp
浏览器打开hostname IP,输入用户名密码 admin/Harbor12345
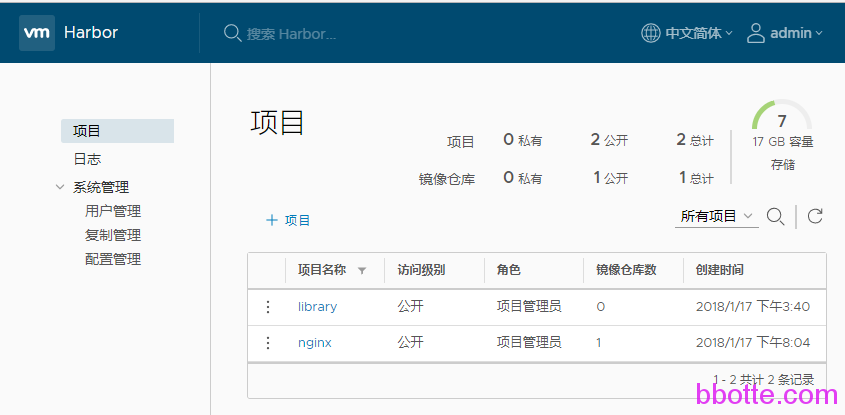
登录harbor管理后台
我们用自建的一个nginx镜像推送到harbor仓库:
登录harbor出错
# docker login 192.168.22.69
Username (admin): admin
Password:
Error response from daemon: Get https://192.168.22.69/v1/users/: dial tcp 192.168.22.69:443: getsockopt: connection refused<br>
docker login -u admin -p passwd http://harbor.bbotte.com
Error response from daemon: Get http://harbor.bbotte.com/v2/: unauthorized: authentication required

解决方法:
# egrep -v ".*#|^$" harbor.yml|head
hostname: harbor.bbotte.com
http:
  port: 80
external_url: http://harbor.bbotte.com
harbor_admin_password: passwd
database:
  password: root123
  max_idle_conns: 100
  max_open_conns: 900
data_volume: /data

修改 external_url 项
在docker的daemon.json添加安全的仓库ip或者域名
# cat /etc/docker/daemon.json
{
  "exec-opts": ["native.cgroupdriver=systemd"],
  "insecure-registries":["192.168.22.69"]
}
[root@node nginx]# systemctl restart docker
推送镜像到harbor
把现有的nginx镜像打标签:
# docker images|grep nginx
bbotte/nginx v0.1 85a2412ecda1 54 minutes ago 367 MB

# docker tag bbotte/nginx:v0.1 192.168.22.69/nginx:v0.1
这时候直接推送:
docker push 192.168.22.69/nginx:v0.1
received unexpected HTTP status: 500 Internal Server Error
是因为harbor没有nginx这个项目,因此在harbor新建nginx项目,访问级别为公开(所有人都可不经过认证push、pull)
再次打标签,前一个nginx是项目名,后一个nginx是镜像名称,v0.1是版本
docker tag 本地镜像名:版本  harbor仓库域名/项目名称/镜像名称:版本
# docker tag bbotte/nginx:v0.1 192.168.22.69/nginx/nginx:v0.1
# docker push 192.168.22.69/nginx/nginx:v0.1
在kubernetes新建项目,拉取镜像为
docker pull 192.168.22.69/nginx/nginx:v0.1
使用默认配置,简单的推送images,拉取images就完成了。当然harbor还有2个高级功能,clair、notary
clair插件
clair 是coreos 开源的容器漏洞扫描工具 Notary 是一套docker镜像的签名工具, 用来保证镜像在pull,push和传输工程中的一致性和完整性。避免中间人攻击,避免非法的镜像更新和运行
使用notary需要设置ssl证书:https://github.com/goharbor/harbor/blob/master/docs/configure_https.md,下面用自建ssl证书举例,使用ssl即harbor仓库访问地址也用ssl证书加密
生成一个自签名证书
# openssl req -newkey rsa:4096 -nodes -sha256 -keyout ca.key  -x509 -days 365 -out ca.crt
Country Name (2 letter code) [XX]:SH
State or Province Name (full name) []:ShangHai
Locality Name (eg, city) [Default City]:JingAn
Organization Name (eg, company) [Default Company Ltd]:bbotte
Organizational Unit Name (eg, section) []:blog
Common Name (eg, your name or your server's hostname) []:192.168.22.69
Email Address []:bbotte@163.com

生成证书签名请求
# openssl req -newkey rsa:4096 -nodes -sha256 -keyout 192.168.22.69.key -out 192.168.22.69.csr

生成注册主机的证书
a,使用IP
echo subjectAltName = IP:192.168.22.69 > extfile.cnf
openssl x509 -req -days 365 -in 192.168.22.69.csr -CA ca.crt -CAkey ca.key -CAcreateserial -extfile extfile.cnf -out 192.168.22.69.crt
b,使用域名
openssl x509 -req -days 365 -in yourdomain.com.csr -CA ca.crt -CAkey ca.key -CAcreateserial -out yourdomain.com.crt

复制证书到harbor默认证书目录
mkdir -p /data/cert
cp 192.168.22.69.crt /data/cert/server.crt
cp 192.168.22.69.key /data/cert/server.key
编辑harbor.cfg,访问链接协议http改为https,并安装clair插件
# vim harbor.cfg
ui_url_protocol = https

# ./install.sh --with-clair
安装完成后火狐浏览器访问 https://IPADDR,输入用户名密码登录即可
notary插件
notary插件(–with-notary)安装完成后,安装文档操作了,提示.cert不知道怎么弄,有做好的小伙伴请留言,求学习
# docker -D pull hub.bbotte.com/nginx/nginx:v0.3
DEBU[0000] reading certificate directory: /root/.docker/tls/192.168.22.69:4443
DEBU[0000] crt: /root/.docker/tls/192.168.22.69:4443/hub.bbotte.com.crt
DEBU[0000] key: /root/.docker/tls/192.168.22.69:4443/hub.bbotte.com.key
Error establishing connection to trust repository: Missing client certificate hub.bbotte.com.cert for key hub.bbotte.com.key
Missing client certificate hub.bbotte.com.cert for key hub.bbotte.com.key
notary插件之后继续查看
查看/data文件夹,是仓库默认存储位置和配置文件
# ls /data/
ca_download  clair-db  database      job_logs   psc       secretkey
cert         config    defaultalias  notary-db  registry
# ls /data/registry/docker/registry/v2/repositories/
nginx
当然也有mysql数据库,创建的nginx项目在registry目录
harbor仓库删除docker images镜像
下面是1.5版本:
1,首先在harbor dashboard界面删除,这一步不是真正删除,只是标记,正常情况下,删除都是成功的,如果”删除失败”, Size 大小变为0,那么重新docker push这个镜像,再删除,一般可以成功
如果没有这个镜像,那么随便找一个镜像,再docker tag 随便的镜像 大小为0的镜像
docker push 大小为0的镜像
在ui界面刷新后删除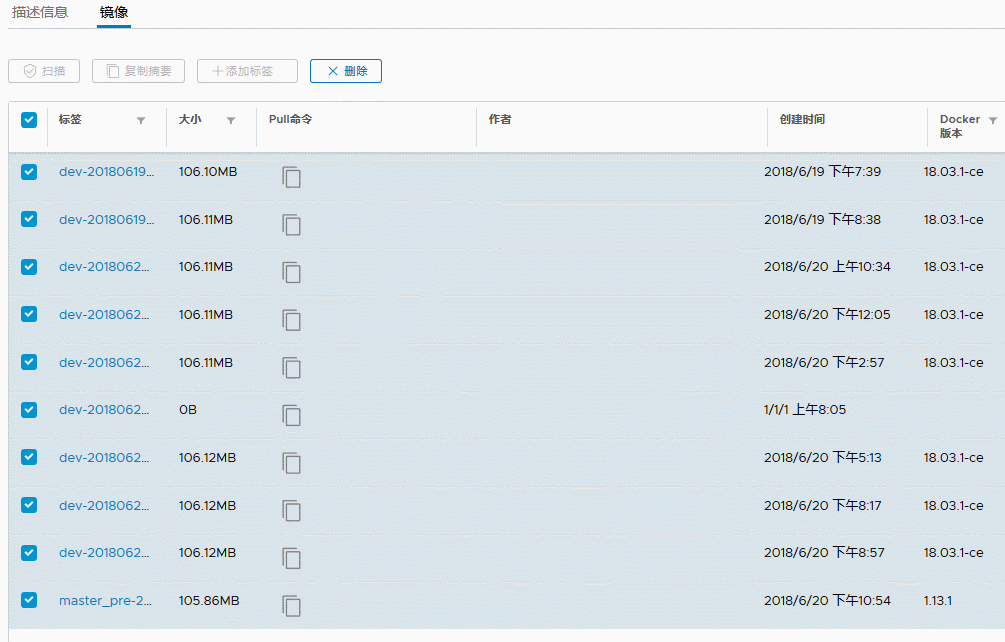
2,停止harbor服务后删除磁盘的docker images
$ docker-compose stop
$ docker run -it --name gc --rm --volumes-from registry vmware/registry-photon:v2.6.2-v1.5.0 garbage-collect --dry-run /etc/registry/config.yml
$ docker run -it --name gc --rm --volumes-from registry vmware/registry-photon:v2.6.2-v1.5.0 garbage-collect /etc/registry/config.yml
$ docker-compose start
这时候再df -h 查看磁盘空间
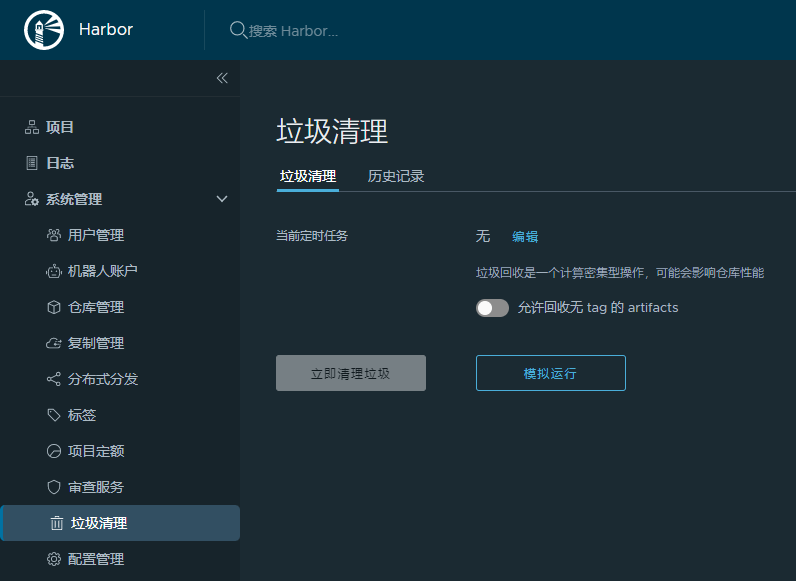
新版本的harbor在 项目 中删除镜像后,点击 垃圾清理 就可以了
2018年01月18日 于 linux工匠 发表