squid+stunnel+ldap距离网络更近一步
目的:为公司人员提供更便捷的网络服务
需要2台主机:一个香港阿里云主机,一个国内云主机
              国内云主机                国外云主机
            |stunnel对信息加密|  ---- | stunnel对信息加密 |
Client ---- |               |       | squid            | ----- google
这样做主要是依赖公司的ldap登录而控制登录人员,如果个人用的话肯定ss啦,另外需要一台国内的云主机,而不是只有内网的虚拟机,浏览器的话用火狐,因为修改配置不会影响主机,而谷歌浏览器会更改系统的配置
国外云主机squid+stunnel:
# cat /etc/centos-release
CentOS release 6.9 (Final)
# yum install squid stunnel -y
测试ldap通不通,下面输入ldap的用户名密码后,等待结果
# /usr/lib64/squid/squid_ldap_auth -b "dc=office,dc=bbotte,dc=com" -f "uid=%s" -h LDAP_ADDR -v 3
ldap_user ldap_pass
squid_ldap_auth: WARNING, LDAP search error 'Can't contact LDAP server'  #ldap服务连不上,不成功
ERR Success
当出现 OK 的时候说明此连接方式是正确的
ldap连接测试完成后,配置squid
# egrep -v "^$|^#" /etc/squid/squid.conf
auth_param basic program /usr/lib64/squid/squid_ldap_auth -b "dc=office,dc=bbotte,dc=com" -f "uid=%s" -h 192.168.100.1 -v 3
auth_param basic realm Bbotte.com
auth_param basic children 50
acl ldapauth proxy_auth REQUIRED

acl manager proto cache_object
acl localhost src 127.0.0.1/32 ::1
acl to_localhost dst 127.0.0.0/8 0.0.0.0/32 ::1
acl localnet src 10.0.0.0/8	# RFC1918 possible internal network
acl localnet src 172.16.0.0/12	# RFC1918 possible internal network
acl localnet src 192.168.0.0/16	# RFC1918 possible internal network
acl localnet src fc00::/7       # RFC 4193 local private network range
acl localnet src fe80::/10      # RFC 4291 link-local (directly plugged) machines
acl SSL_ports port 443
acl Safe_ports port 80		# http
acl Safe_ports port 21		# ftp
acl Safe_ports port 443		# https
acl Safe_ports port 70		# gopher
acl Safe_ports port 210		# wais
acl Safe_ports port 1025-65535	# unregistered ports
acl Safe_ports port 280		# http-mgmt
acl Safe_ports port 488		# gss-http
acl Safe_ports port 591		# filemaker
acl Safe_ports port 777		# multiling http
acl CONNECT method CONNECT

http_access allow manager localhost
http_access deny manager
http_access deny !Safe_ports
http_access deny CONNECT !SSL_ports

http_access allow localnet
http_access allow ldapauth
http_access allow localhost
http_access deny all

http_port 3128
coredump_dir /var/spool/squid
refresh_pattern ^ftp:		1440	20%	10080
refresh_pattern ^gopher:	1440	0%	1440
refresh_pattern -i (/cgi-bin/|\?) 0	0%	0
refresh_pattern .		0	20%	4320
/etc/init.d/squid start
配置stunnel
需要先创建认证
openssl genrsa -out key.pem 2048
openssl req -new -x509 -key key.pem -out cert.pem -days 1095
cat key.pem cert.pem >> /etc/stunnel/stunnel.pem
# egrep -v "^$|^#" /etc/stunnel/stunnel.conf
cert = /etc/stunnel/stunnel.pem
key = /etc/stunnel/stunnel.pem
CAfile = /etc/stunnel/stunnel.pem
socket = l:TCP_NODELAY=1
socket = r:TCP_NODELAY=1
pid = /tmp/stunnel.pid
verify = 2
setuid = root
setgid = root
client = no
delay = no
sslVersion = TLSv1
fips=no
debug = 7
syslog = no
output = /var/log/stunnel.log
[squid]
accept = 12345   #这个端口是和国内云主机stunnel服务通信端口
connect = 127.0.0.1:3128   #连接本机的squid服务
stunnel 启动服务
netstat -tnlp查看服务端口,查看2个服务的日志
/var/log/squid/access.log
/var/log/stunnel.log
国内云主机stunnel
# cat /etc/centos-release
CentOS Linux release 7.3.1611 (Core)
# yum install stunnel -y
copy一份国外云主机 /etc/stunnel/stunnel.pem 文件到本机
# egrep -v "^$|^#" /etc/stunnel/stunnel.conf
cert = /etc/stunnel/stunnel.pem
socket = l:TCP_NODELAY=1
socket = r:TCP_NODELAY=1
verify = 2
CAfile = /etc/stunnel/stunnel.pem
client=yes
compression = zlib
ciphers = AES256-SHA
delay = no
failover = prio
sslVersion = TLSv1
fips = no
debug = 7
syslog = no
output = /var/log/stunnel.log
[squid]
connect = x.x.x.x:12345   #国外云主机的ip+stunnel端口
accept  = 0.0.0.0:23456   #client用户连接的端口
启动stunnel服务
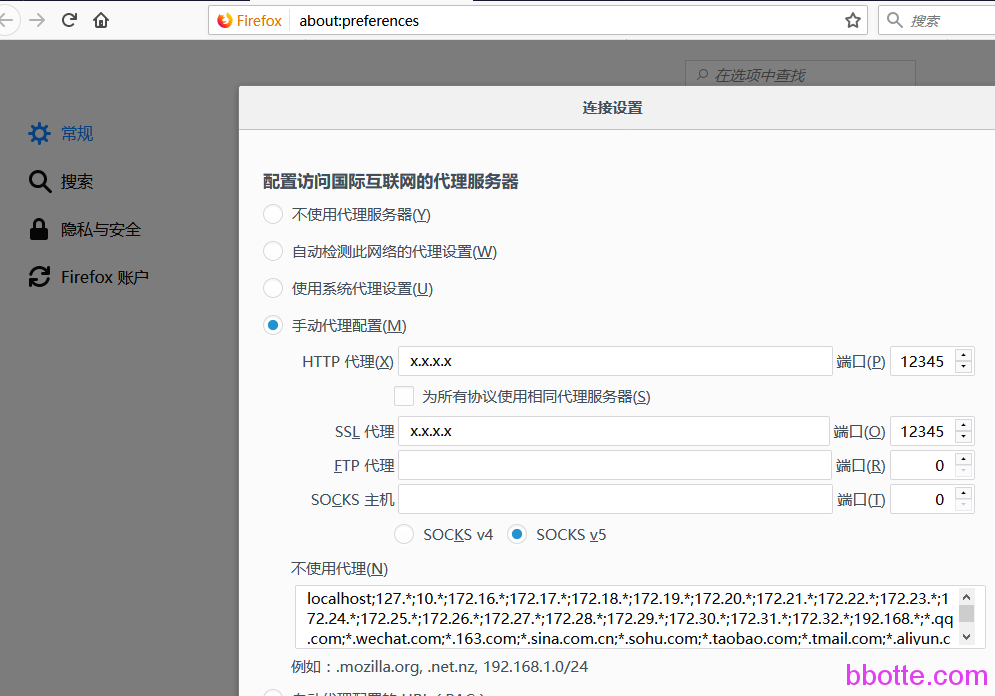
客户端浏览器配置
2017年11月26日 于 linux工匠 发表